Never underestimate the power of an
organized bathroom! Getting ready in the
morning is all about having a system and being able to access the items you
need to use in a quick and easy manner.
We aren’t Kylie Jenner showing off
our perfect makeup organization, and our bathroom cabinets aren’t part of a
daily home magazine photo shoot that need to look camera ready and picture
perfect. The following 10 tips are practical
tips to keep your bathroom clean and perfectly organized.
Here's my 10 Step Process for
de-cluttering and cleaning your bathroom:
1.
Empty out all of your bathroom cabinets.
2.
Place contents into divided piles. (For example lipsticks into one pile, eye shadow in another,
shampoo in another one….(you get the picture)
3.
Get rid of anything you haven't used in the last 3-6 months or
anything that's old.
This applies to old bottles of lotion or products that are nearly
empty. Don't keep old products! Their
effectiveness diminishes and most of them lose their original scents over time.
4.
Buy plastic bins/containers (like you
see in my photos below) to put the items that you're keeping in to. (See my photos below) You can always raid your plastic food
container stash, and use those little containers if you don’t have time to run
to the store right now. They make great
storage bins for lipsticks, eye shadows, etc. You don't need to spend a lot of
money to get organized, and little boxes work well too! I love the acrylic sorters for my lipsticks
and mini cosmetics, and they can be found at any Bed, Bath, Beyond for a small
amount of money. TJ Maxx's and Marshall's also sells them.
5.
Organize your hair ties, headbands and clips:.
Get rid of old hair ties that are
stretched out, broken or have those metal bars around them Place the good ones into their own, separate
container. Do the same thing for your
hair clips and hair pins. Separating
them out allows you to see exactly what you have available to you when getting
ready. Put your headbands into a plastic container too. I sort mine out by
color and place each color group into their own ziploc bag within that bin. When I want to wear a headband, I just pull
out the bin and go to what color group I'm looking for.
NOTE: I don't keep tons of headbands,
so there's not a lot fussing to find the one that I need. Throw out the ones you haven't worn since
high school. Headbands will create
bathroom chaos and clutter by getting caught on everything, and they also have
a magnificient way of collecting dust and gross hair. So, be smart and keep only the ones you’ll
wear.
6. Clean out those drawers.
Literally!
Vacuum out your drawers and cabinets
and wipe them down: by now, you've probably noticed all of the hair, makeup and
products that have built up in your drawers over time. Get a small vacuum and take out all of the
hair from the cabinets and drawers.
Using the cleaning product of your choice, wipe down and remove all
grime and residue. Cleaning out the
cabinets properly sets a clean stage for your entire reorganizing process. (You can also place liners in your drawers
for future protection of the cabinet finishes if you chose to do so).
Wipe down all products that you're
keeping. It's a habit of mine to always
wipe down or rinse off all of my bathroom products after using them. It only takes a fraction of a second, but it
helps to keep my drawers, cabinets and shower clean. Plus, the next time I go to use the item it
doesn't get my hands all goopy and gross.
7. Get rid of all old
tweezers, nail clippers, nail files and pumice stones.
As you prepare to place all of your
clean items back into your cabinets, trash any of the old items! It seems like
everyone tends to keep those used, gross pumice stones, rusty nail clippers and
old nail files. Throw them out and start
fresh! Pumice stones and nail files are a breeding ground for bacteria and
dirt. My favorite pumice stone is the
one by "Swedish Clover" because dirt and dead skin can't get trapped
into it. Plus, I can easily soak it in
bleach to clean it and it has a lifetime warranty.
8. Clean Your Makeup Brushes and Hair Brushes
Use this time to clean out all of
your brushes and makeup brushes. This is
a good habit to get into, as makeup brushes and hair brushes can build up with
product and hair. There’s nothing worse
than seeing a hairbrush that is loaded up with months or years worth of
hair. I remove all of the hair from my
brushes first, and then soak them in a hot water with a mild shampoo. I then place them in a solution of water and
vinegar before rinsing them off completely.
I wash my makeup brushes often with a makeup brush cleaning solution
from Sephora. You can use whatever brush
cleaning method you prefer. The
important part is that you keep them clean!
9. Sort products on your shelves by category.
As you put back together your
cabinets and drawers, place like products together on shelves. I separate out my shelves by category. One shef for hair products, one for lotions and
creams, etc. Then I sort the products in
rows by product type. For example, I
place leave-in conditioners together, hairsprays together, face washes
together. (You get the picture).
10. One Last Purge
Before we give you your “Gold Star”
for organizing yourself, Skim over the stuff you've kept and see one last time
if there's anything else that you can get rid of. Remember, LESS is more! Especially when it comes to keeping products
and makeup.
10. Stay Organized by
Putting Items Back in Their Place
Now that you're bathroom cabinets are
in tip top shape and you feel back in control, make sure to keep organized by
taking a few seconds each day to put your things back into the proper place and
to also wipe them off before re-storing them.
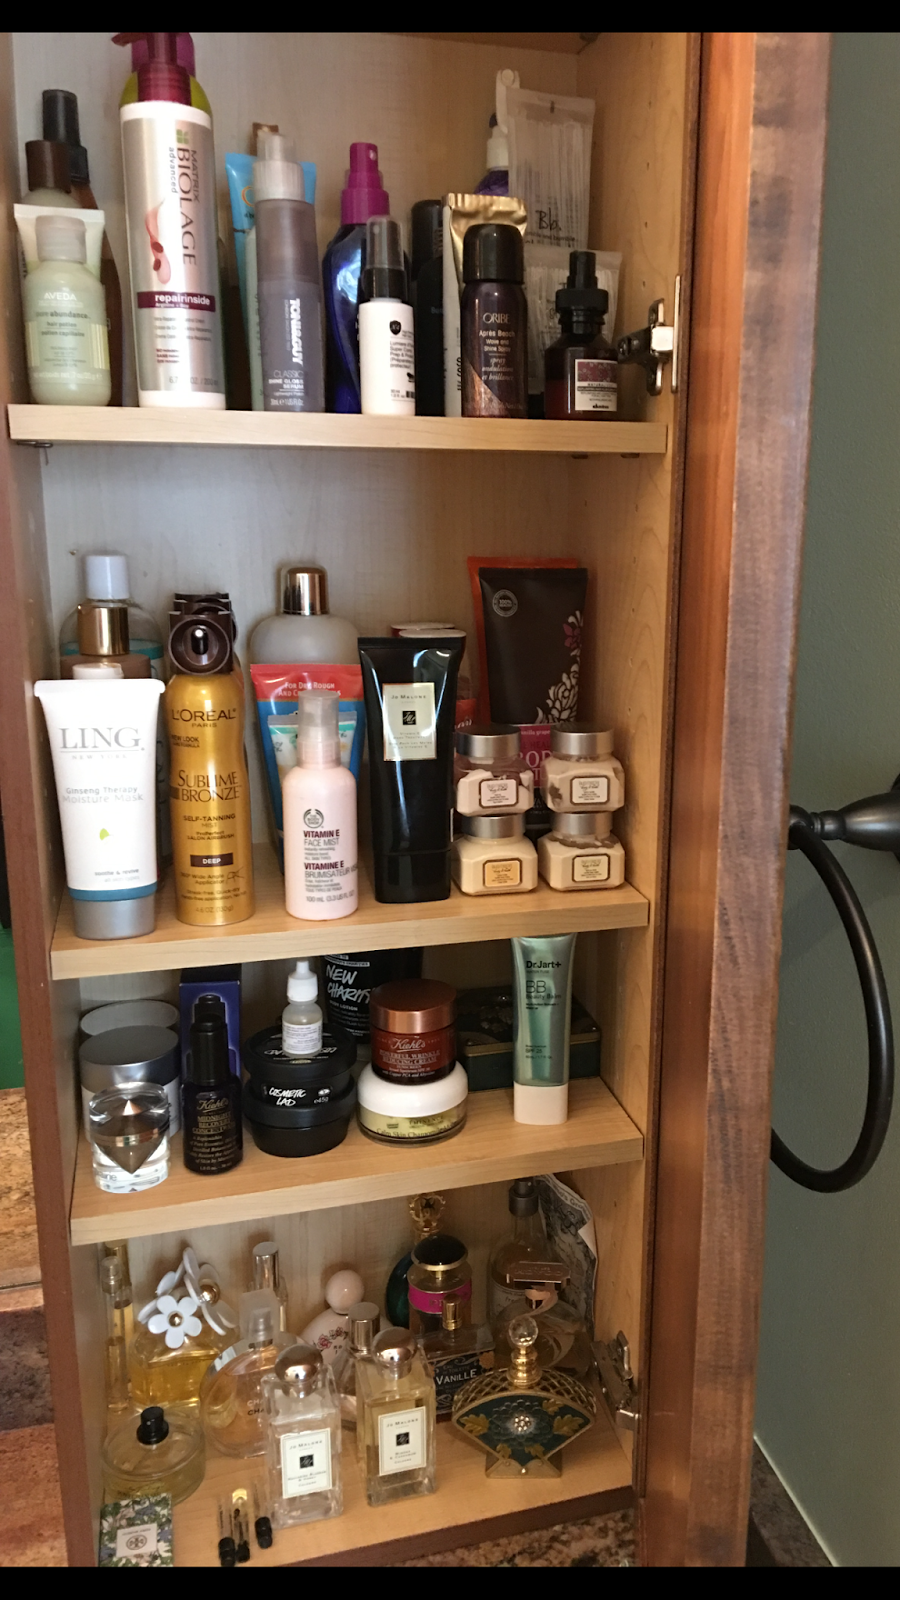 |
| Products lined up in rows by product type. Perfumes on bottom shelf |
 |
| ORGANIZE BY PRODUCT TYPE: (from L to R) hair ties, eye brows, dental floss & whitener, concealers, mascaras, eye pencils |
 |
| lipsticks and extra eye shadow palettes s |
 |
| eye shadows & powders! |
Happy Organizing and thanks for
stopping by today.
